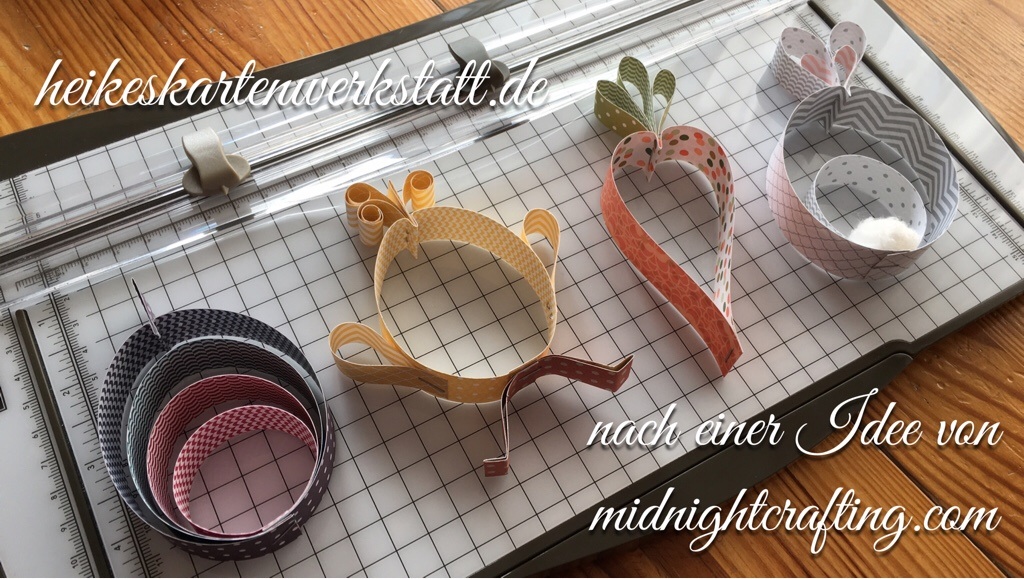
Aren’t they cute?
I found this idea at Angelas Blog midnightcrafting.com. She is showing the carrot, the bunny and the egg. The little chick was my idea. Thank you Angela for posting your lovely easterdecoration.
Here are the messurements in Inch.

And here in cm.
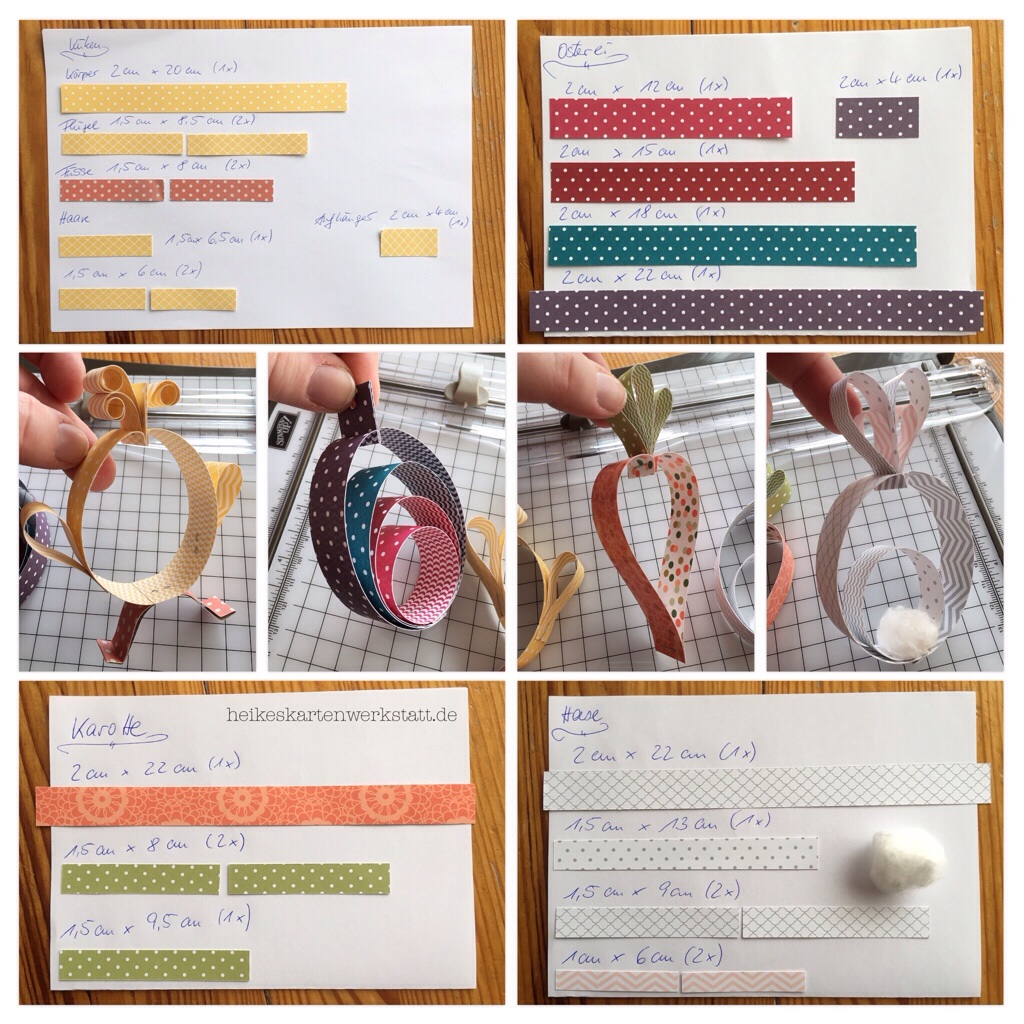
Click on the image for an enlarged view.
The following instructions show you, how the individual objects are assembled.
You only need a stapler, thread and scissors, glue and cotton balls. Well and for cutting a paper cutter and color matching designer paper.
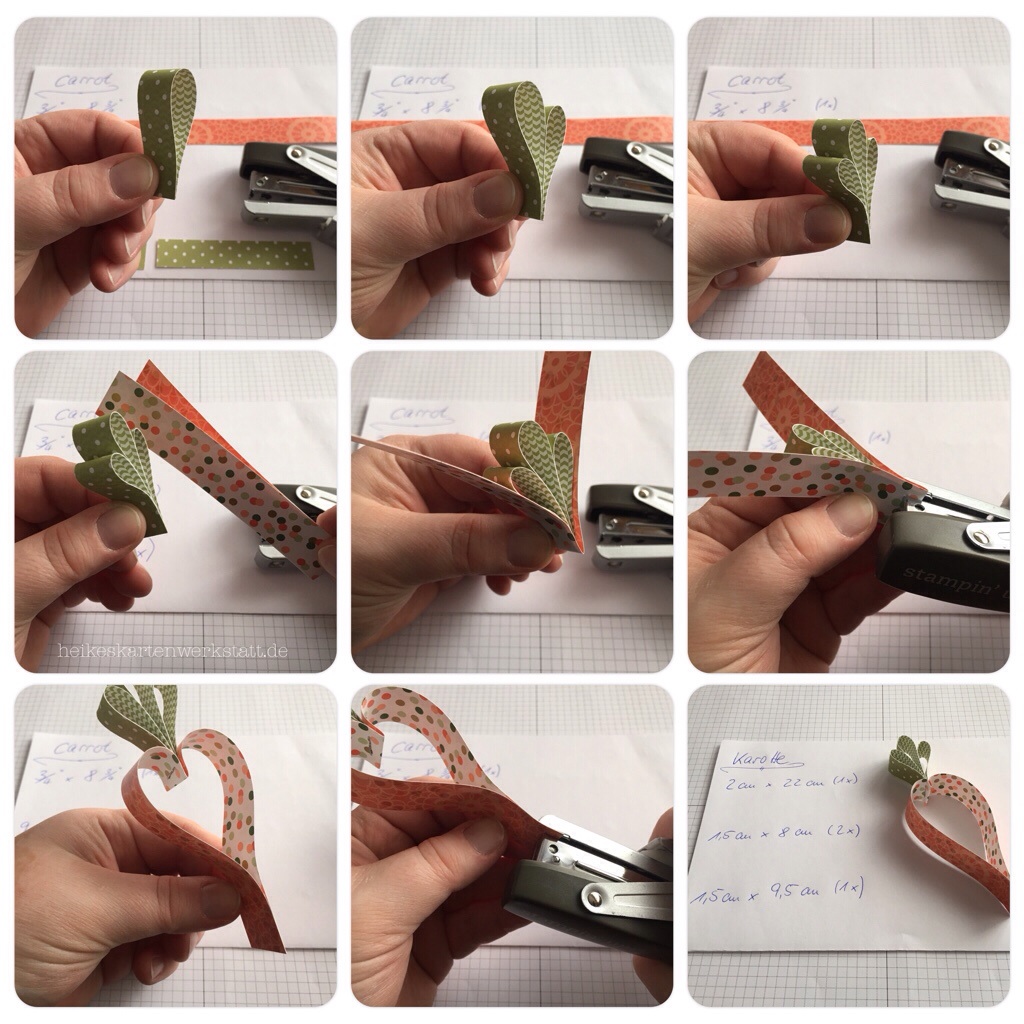
Making the carrot is totally easy. The thread for hanging is drawn through the middle green.
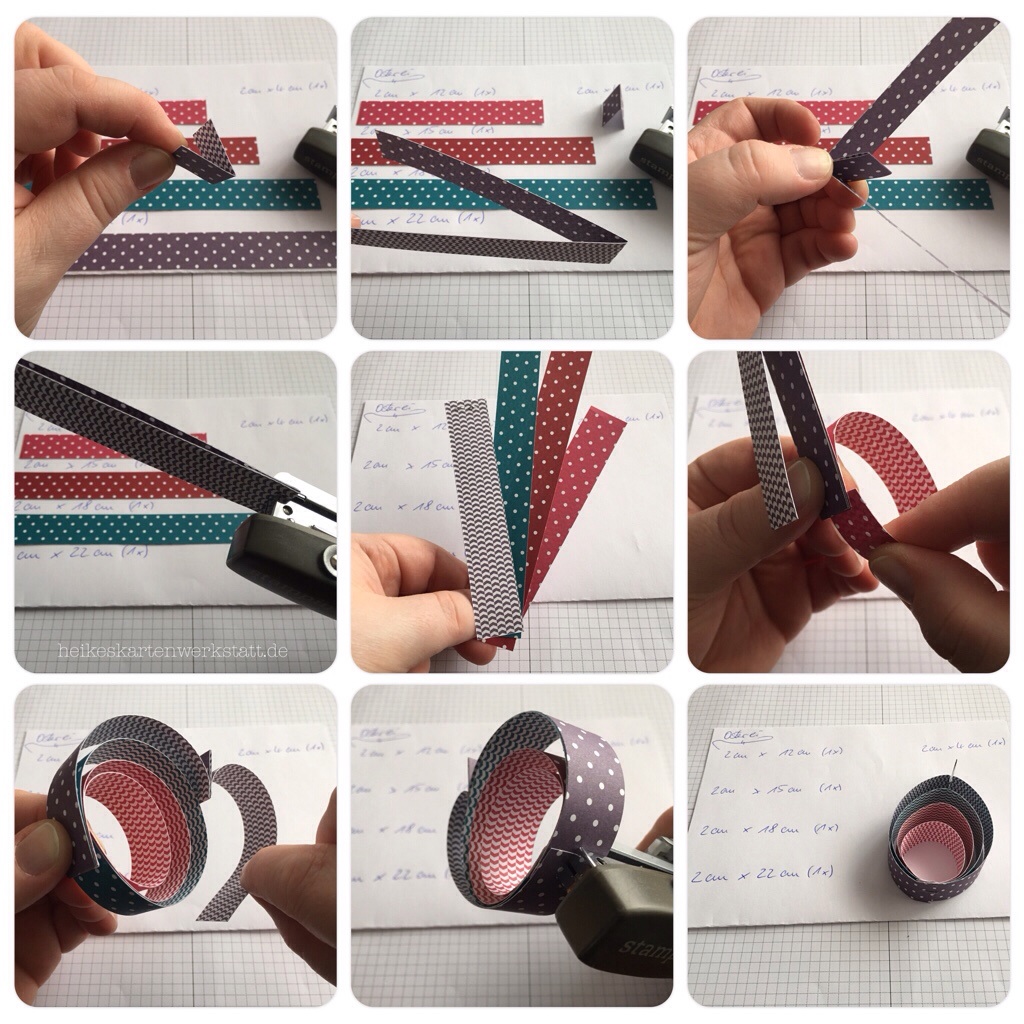
With the egg you install a small hanger, punch a hole in it for the thead. After putting the egg together it looks like a pumpkin. If you pulling the hanger and hold thereby the ground, you create the typical egg shape.
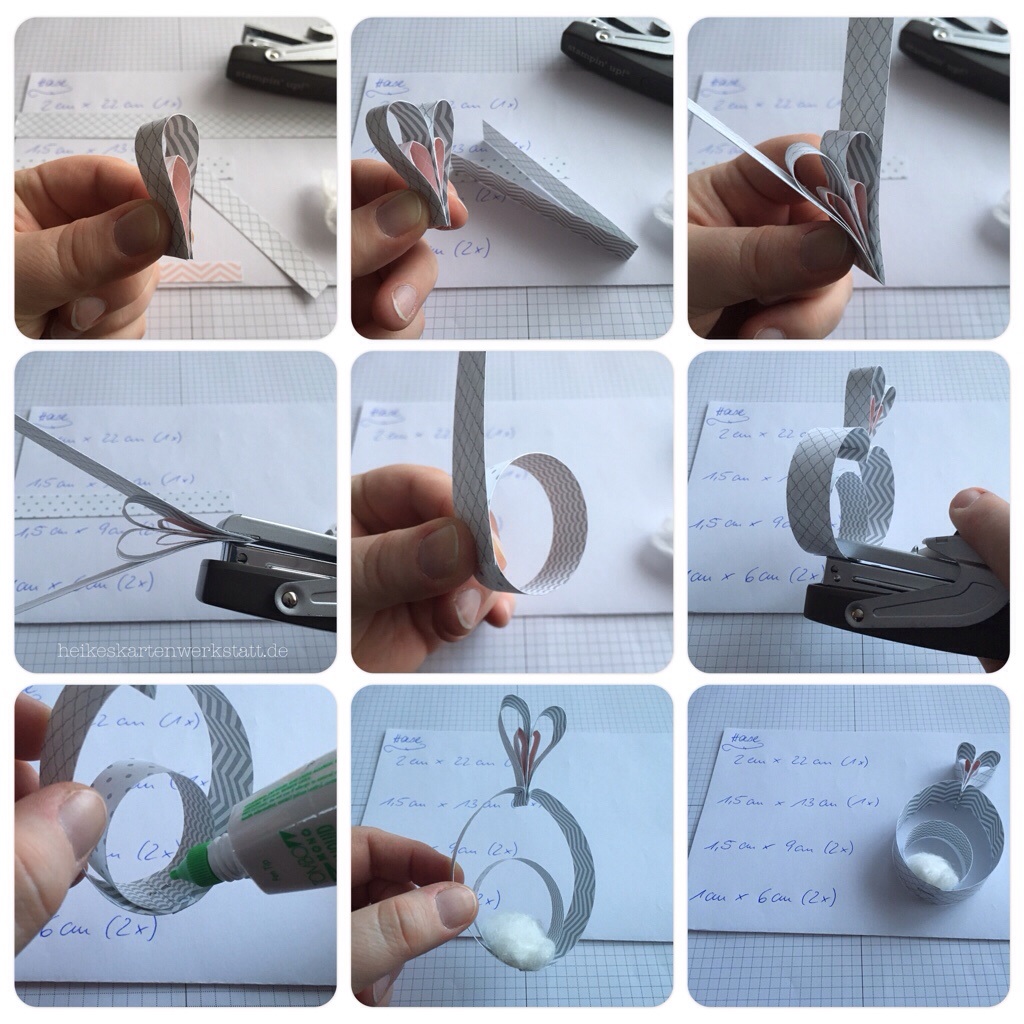
The bunny is more challenging, because the ears have to be matched, and pushed into the body. With a little glue the cotton–tail is stuck in the body.
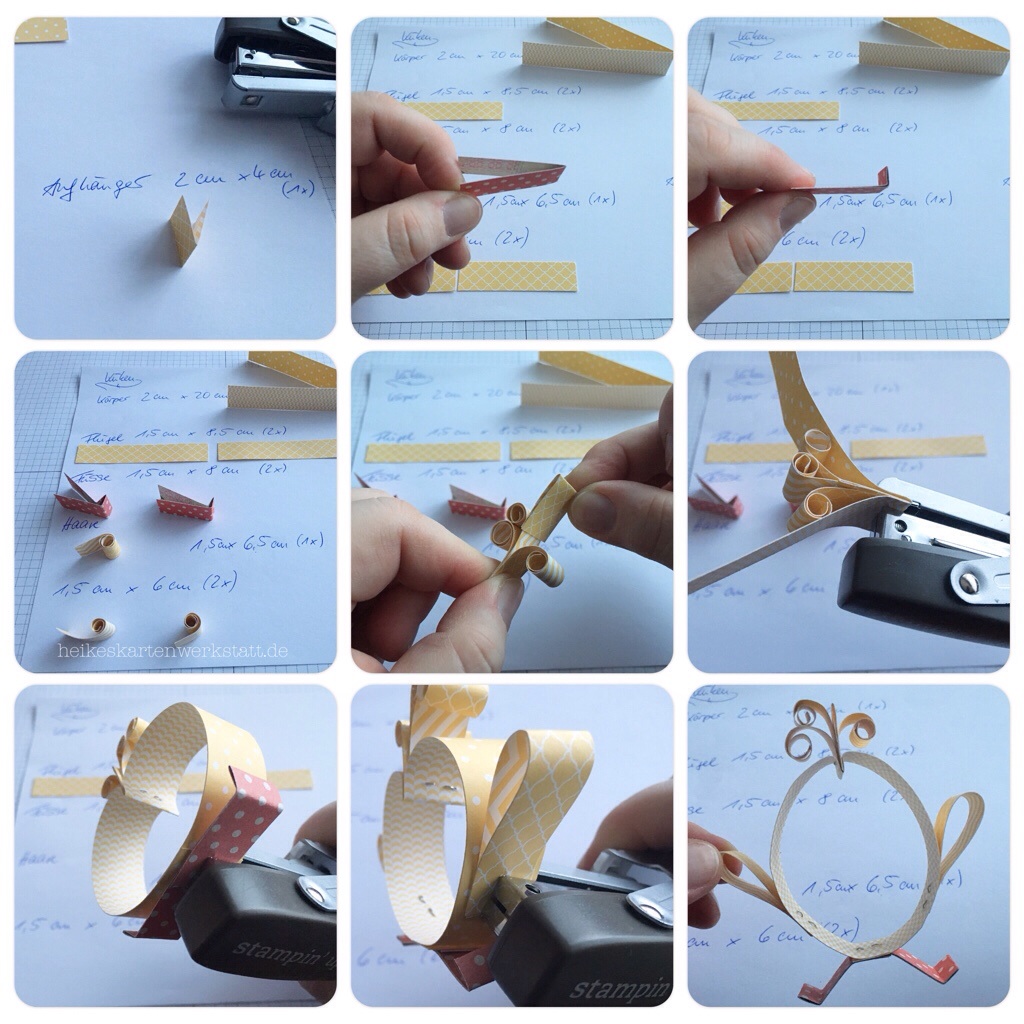
For the chick you folds the hanger (Punch for thread) and the body and the feet into half. The feet have to modeled with a kink. ;O)
The haircurls are connected with the hanger in the middle of the body. When you are closing the body, don’t forget the feet. Fold the strips for the wings and staple it on the Body. Bring the body of the chick in shape.
Bring the feet also in shape, otherwise your chick does a balancing act
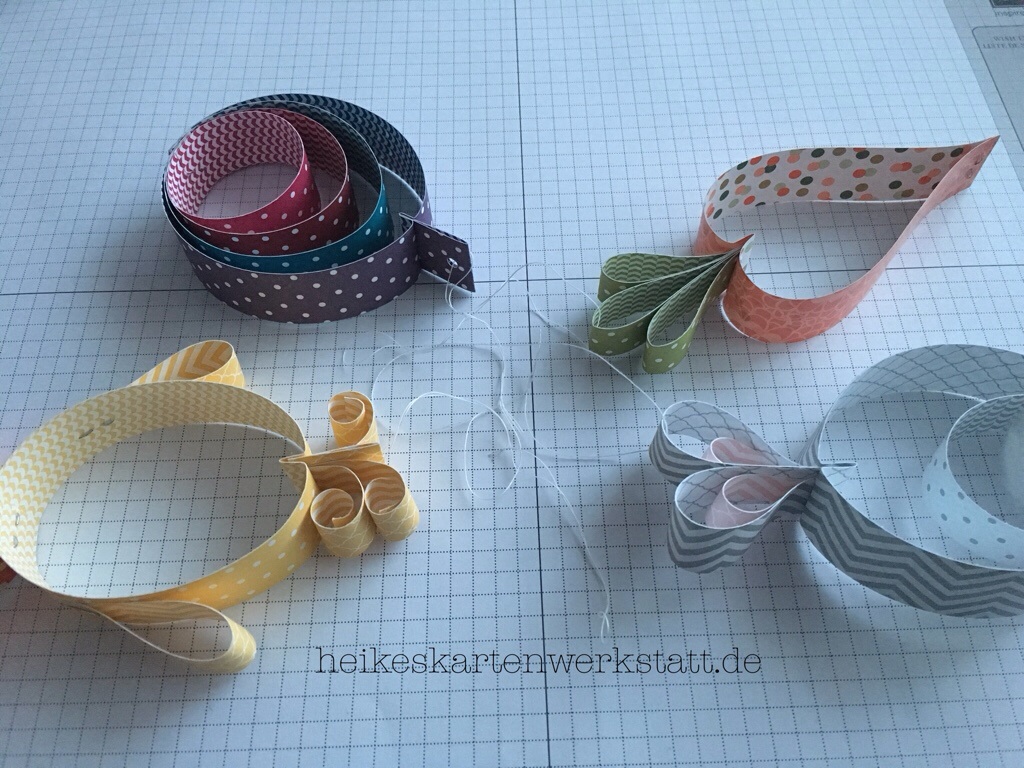
Here you can see them all again with yarn for hanging.
Enjoy reworking. Just show me your results, if you like. And especially if you create a new „family member“.
Greetings from Germany,
Heike
PS: This is my first tutorial in English please excuse all my mistakes.